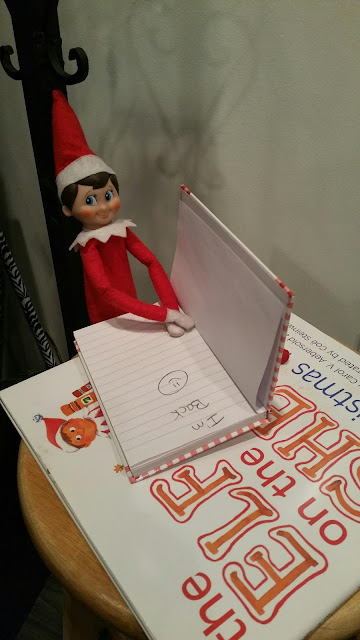
I will post these daily. Make sure to follow all my other links! Weekly videos will be on youtube as well!
Showing posts with label new. Show all posts
Showing posts with label new. Show all posts
Monday, November 30, 2015
Saturday, November 28, 2015
Friday, November 20, 2015
Wednesday, November 19, 2014
Elf on the shelf ideas
I post weekly check back here or on my youtube videos!
Brace yourself, its that time of season.... uggggh
Tuesday, October 28, 2014
Fall 3 light up their display for food ect... diy under 10 dollars
Ok so are you hosting thanksgiving this year and want and unique way to display food and no save on counter space too?
Ok then we are thinking a like ... this is what I came up with!
It's under a 10 dollar diy and everything came from dollar tree!!
What I used
2 packs of leaves
2 boxes of battery power lights ( located by flowers )
2 plates ( color of your choice )
2 vases
and a bowl or another plater up to you!
Hot glue gun
that's it! Are you ready??
If you want to see my next diy make sure you follow me on Instagram
or youtube
ok ok let's get started !
Here is the video
My final project looks like this... pretty happy for how it came out concerning I didn't really have a plan of what I was going for when I started !
I think the lights worked out perfect! Led lights are super bright lol and I hide the battery packs under and covered with leaves
but still able to turn on and off and change battery pack!
The lights I used but I took off all the dragon Flys
Fill your vape with whatever be creative! This would be cute with pine cones or acorns or just gems like my last one I did !
I used a bowl for on top
you could go for a salad plate or whatever really!
I used 2 plates
Leave garland
Labels:
3 teir,
craft,
decoration idea,
diy,
dollar tree,
fall,
food display,
how to,
inspire,
new
Thursday, October 2, 2014
Easy diy Bloody candle
Ok so sometimes it's the simple things you overlook...
I do love halloween, but I do not love scary stuff or I will not watch scary movies.. is that weird. ? Haha
I thought of this for a decoration, I will not be using it in my house but simple and easy for a added spook to your halloween decor :)
This is going to be easy you ready?
Grab a white candle
and some melted red wax ( or another candle in red)
melt the wax ...... then ....
Pour. .. be careful it is hot.
But makes it look scary right ? Great addition to your table or porch for trick or treat lighting
happy haunting !
here is my youtube ....
Labels:
2014,
2014 halloween decorations,
blood,
blood candle,
bloody candle,
candle,
dollar tree,
fall,
Halloween decorations on a budget,
home,
new,
October,
scary decorations,
spooky decorations,
wax
Wednesday, October 1, 2014
I love my mummy wreath under 2 dollar halloween diy
Ok so I love halloween. .. or I guess any holiday I can decorate :)
I will be doing a diy every day up until halloween!
31 days of halloween
this is day 1
Make sure to follow my youtube and other links as some of my things end up in different places!
What I used ...
foam wreath
some Google eyes
and my husband's old shirt ( without him knowing lol )
scissors
and my trusty hot glue gun ...
ready???.... let's make it!
Take your shirt ( I used a gray/white mix shirt ) you can also use gauze!
Cut strips.. messy strips they do not have to be perfect thin to thick mix it up!!
I saved some bigger steps to wrap the wreath at first then the smaller pieces to fill in
Wrap wrap wrap then double knot over and over and over again :)
Glue some Google eyes on
and make a sign :)
I ♡ my mummy!
here is how I did it ...
Labels:
2014 halloween decorations,
budget friendly decorations,
cheap decoration,
decorations,
diy,
dollar tree craft,
easy wreath,
Halloween wreaths,
how to,
mummies,
mummy,
new,
wreath
Saturday, August 30, 2014
Tuesday, May 27, 2014
Friday, May 23, 2014
Wax warmer life hack !
So if you are like me I love my wax warmers! How do you normally get wax out? I use to use a butter knife and pry it out. And have almost broke my warmer like this. Well found a super easy way and decided to share!
All you need is wax ready to be changed and melted and few cotton balls.
Have the wax warmer on with wax completely melted. Take a cotton ball and put it into the hot wax. It will soak up most all of it. Do this until you absorbed it all and then throw another wax square in and your done!
Back to your house smelling amazing ! I posted a video as well on youtube to show how I do mine.
Happy life hacks ! Share any of yours in the comments !
Friday, April 18, 2014
Zebra print patio chairs
Decided to re sand down our chairs and give them a fresh start for spring. This is what I decided to do again this year . I have 5 other chairs yet to paint going to do some leopard print :) I have another bench and a picnic table to finish yet as well. But I'm at least started ! Will post my progress as I go. I am going to have to go back in with a small brush before I clear coat these.
Subscribe to:
Posts (Atom)


